Adding new assets to your inventory is straightforward and flexible with our system. Here’s how you can do it:
Choose a Category: Start by selecting the appropriate category for the asset. This helps in organizing and managing assets based on their type or purpose.
Select a Brand: Choose the brand associated with the asset to keep your inventory sorted by manufacturers.
Pick a Vendor: Record the vendor from whom the asset was purchased. This information is essential for tracking origin details and managing warranty claims.
Upload Documentation: You can upload files or documents related to the asset. This might include purchase receipts, warranty cards, manuals, or any other relevant documents.
Set the Initial Condition: Establish the condition of the asset when adding it to your inventory. This could range from ‘New’ to ‘Used’, ‘Good’, or ‘Poor’, providing a clear initial assessment of its physical state.
By following these steps, you ensure that each asset is cataloged with all necessary details, making management and assignment more efficient.
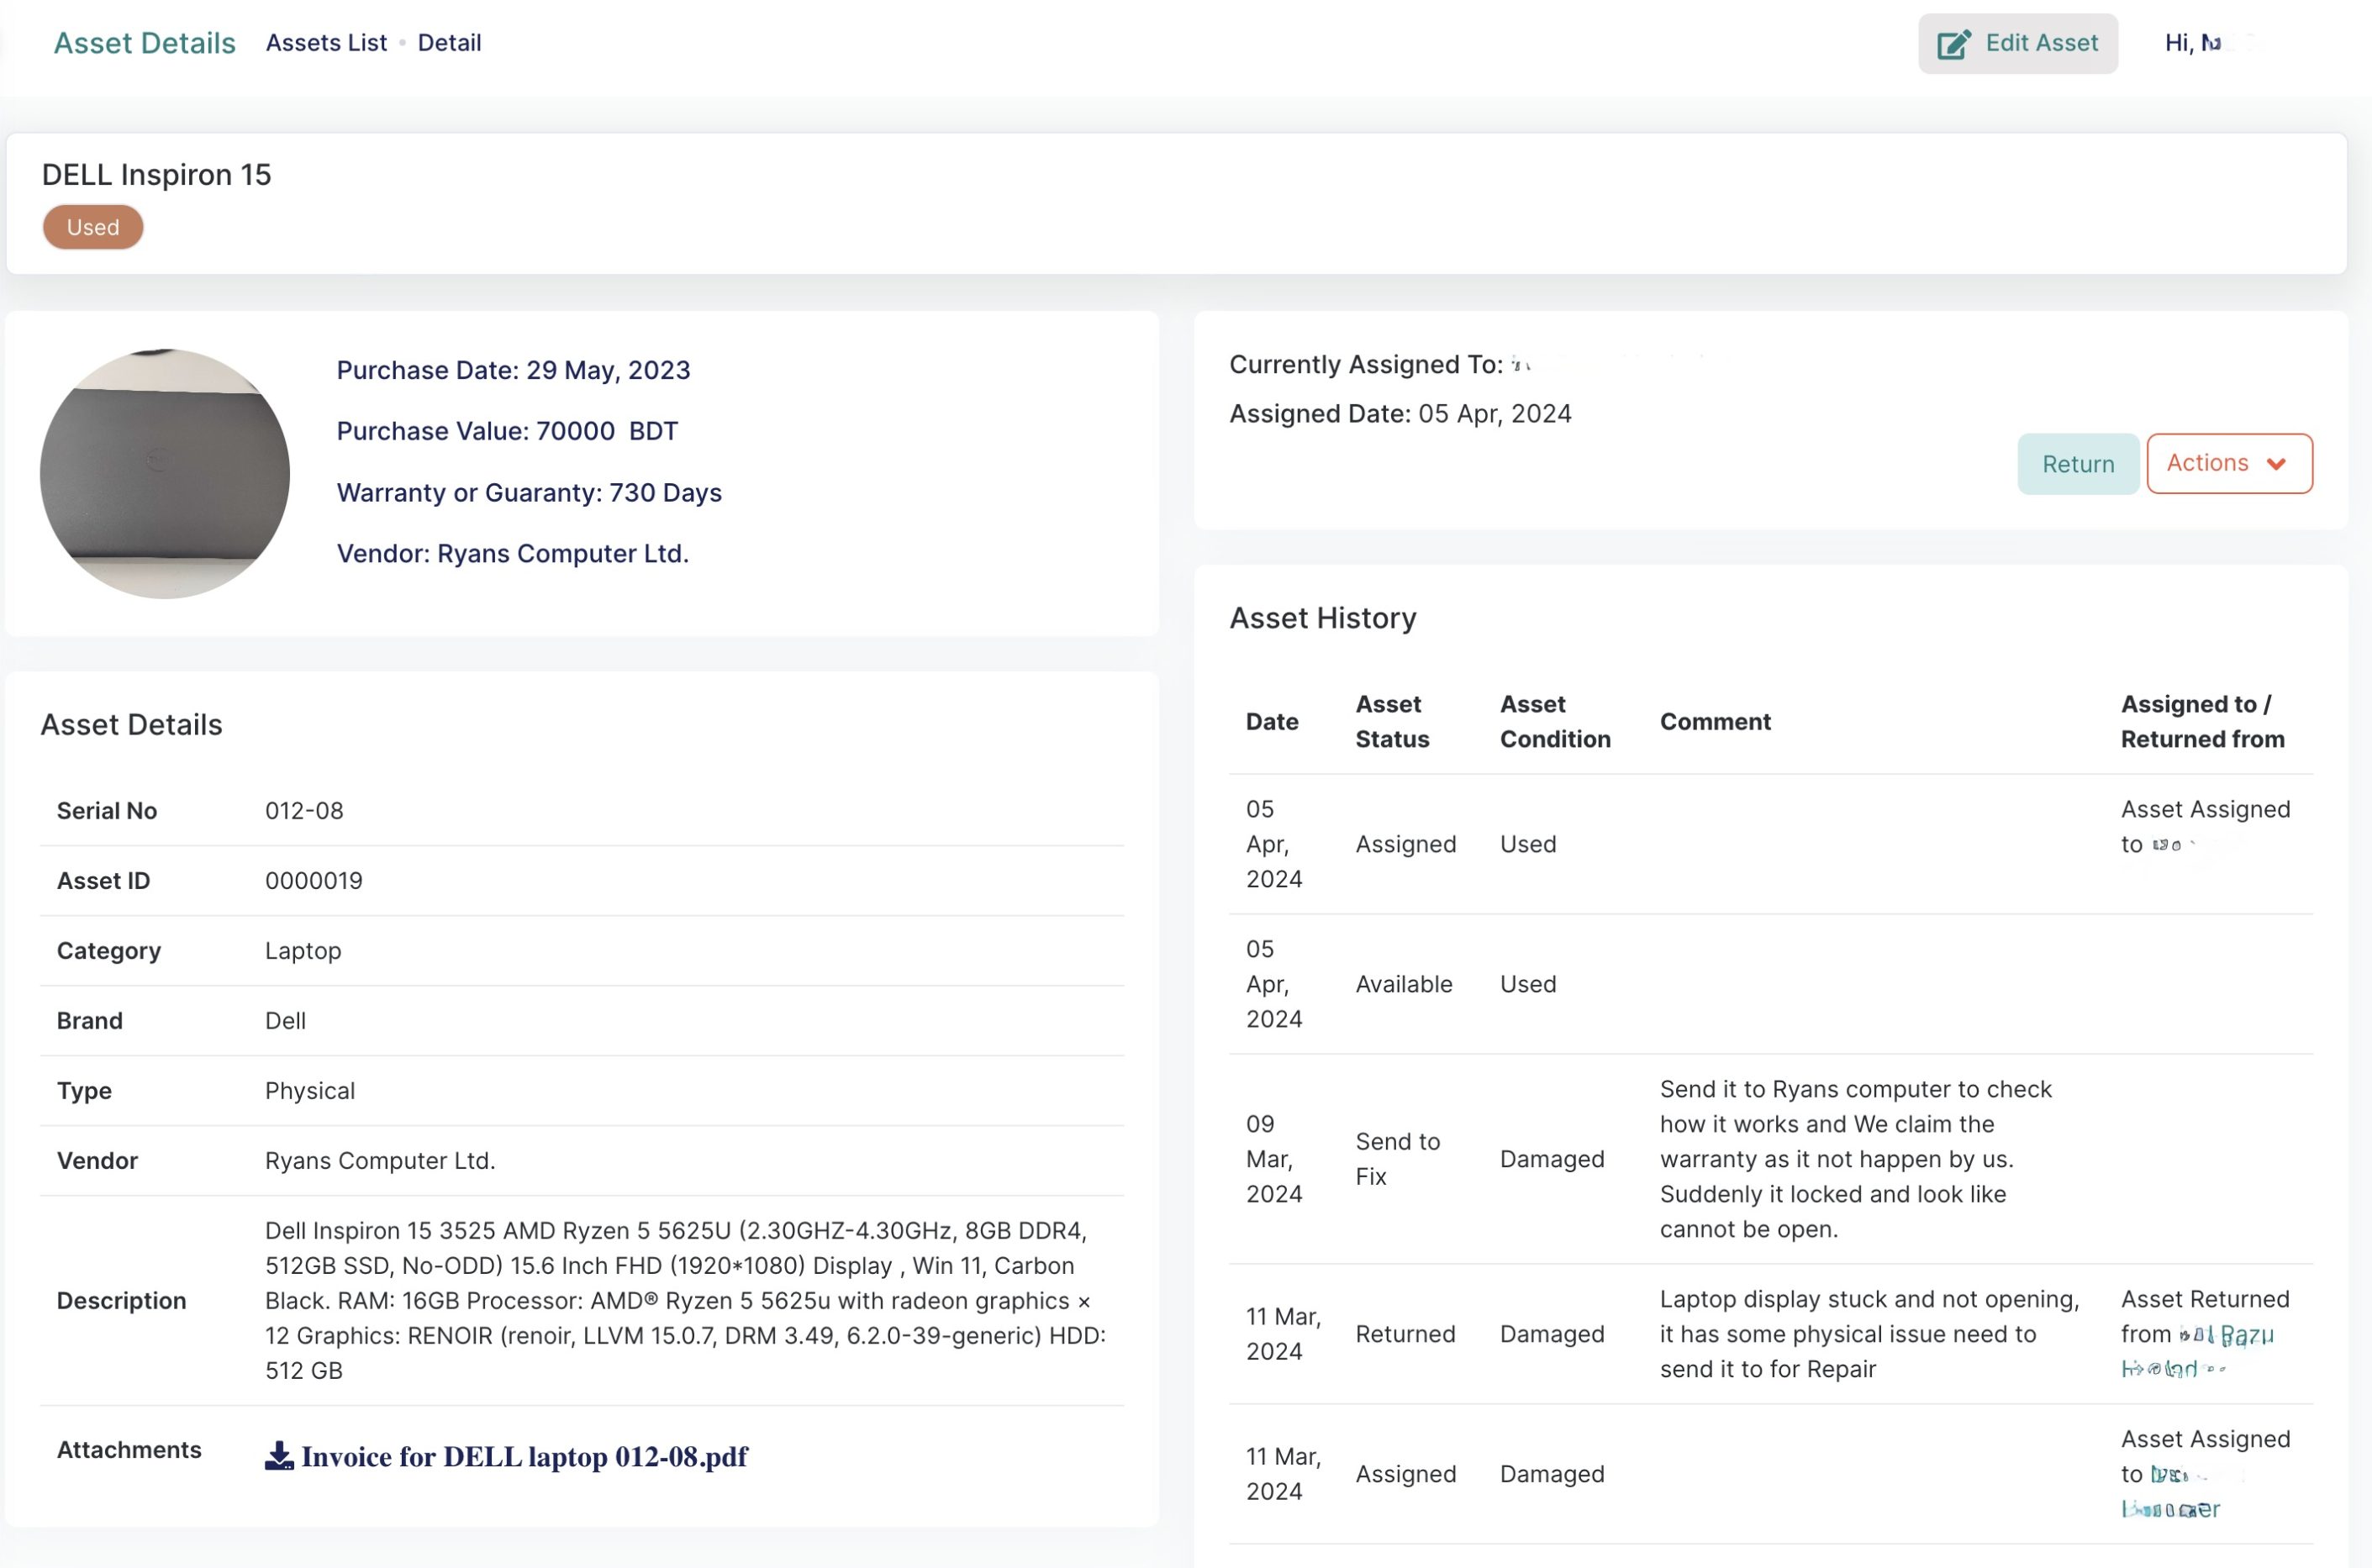
Asset Details:
This is one of our assets details with history.
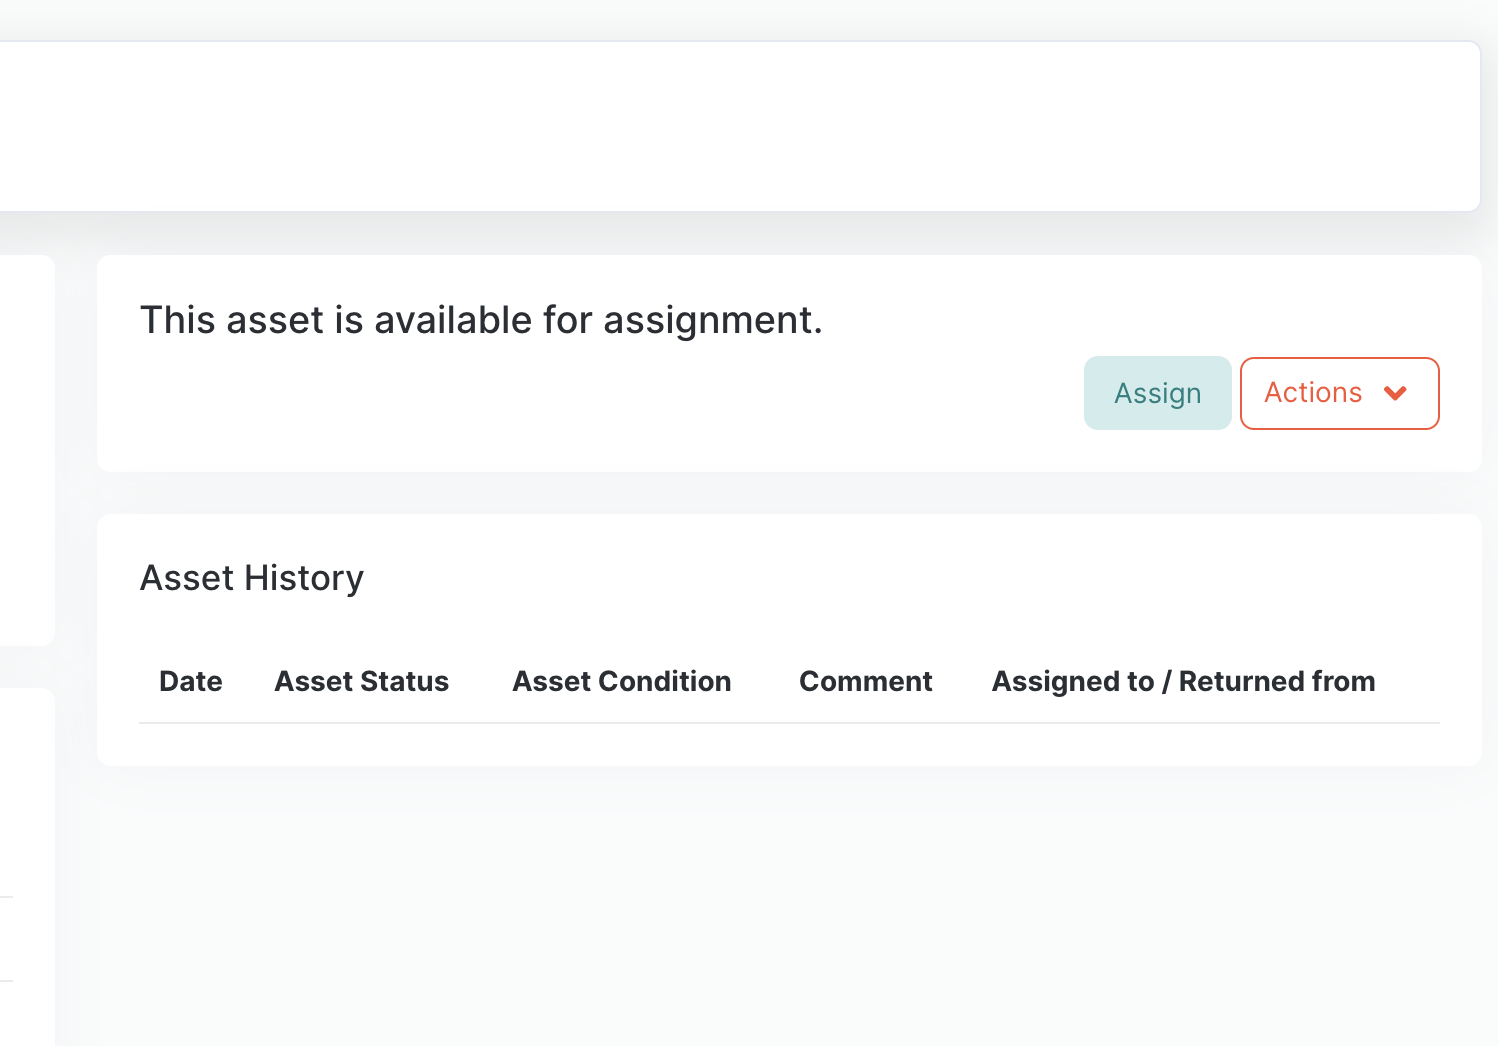
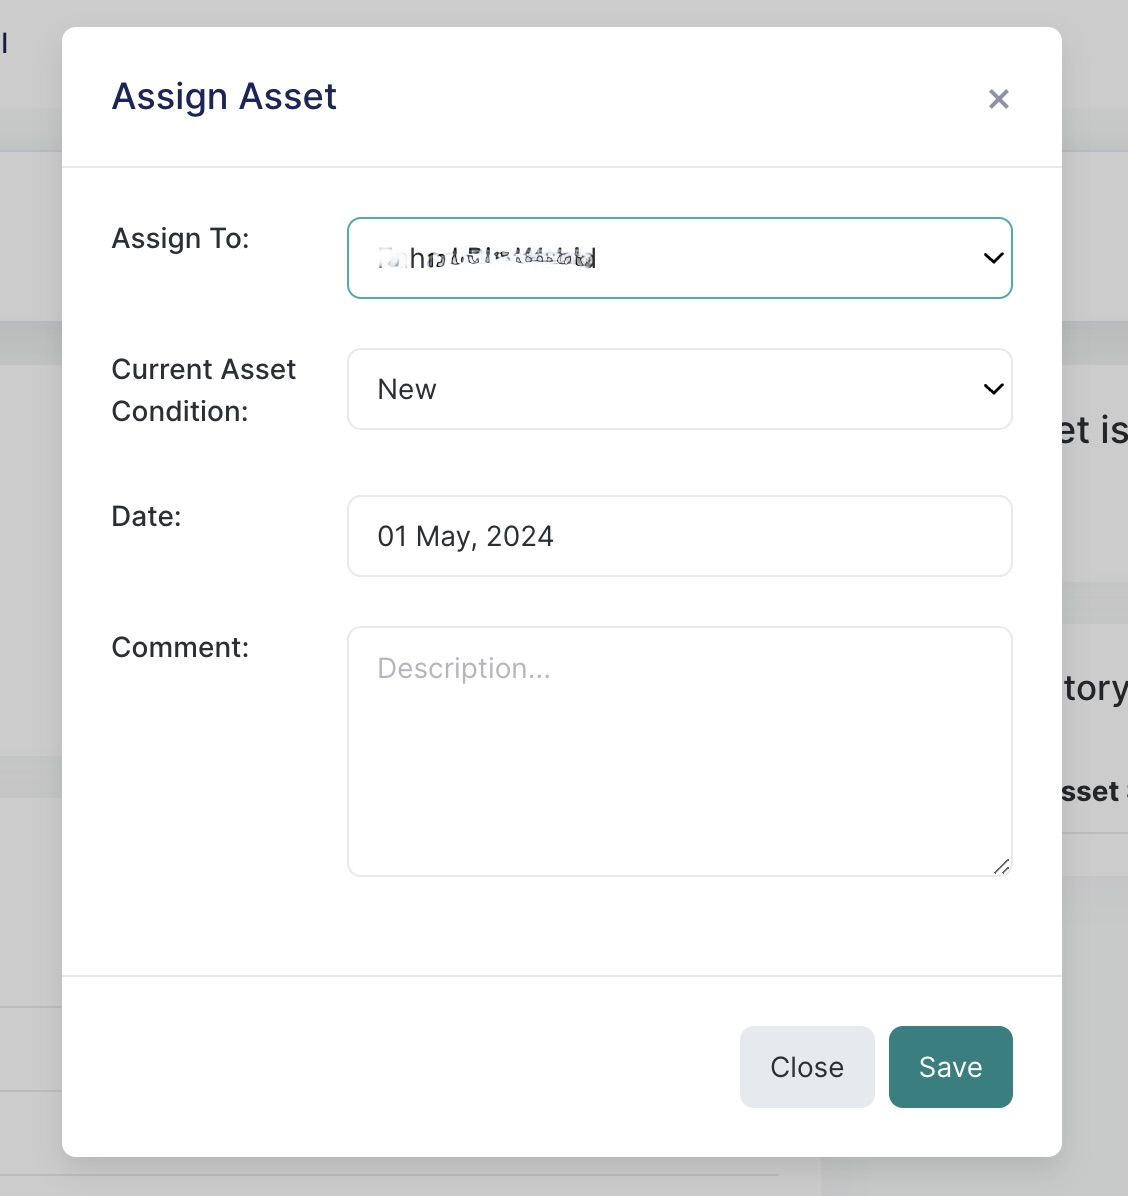
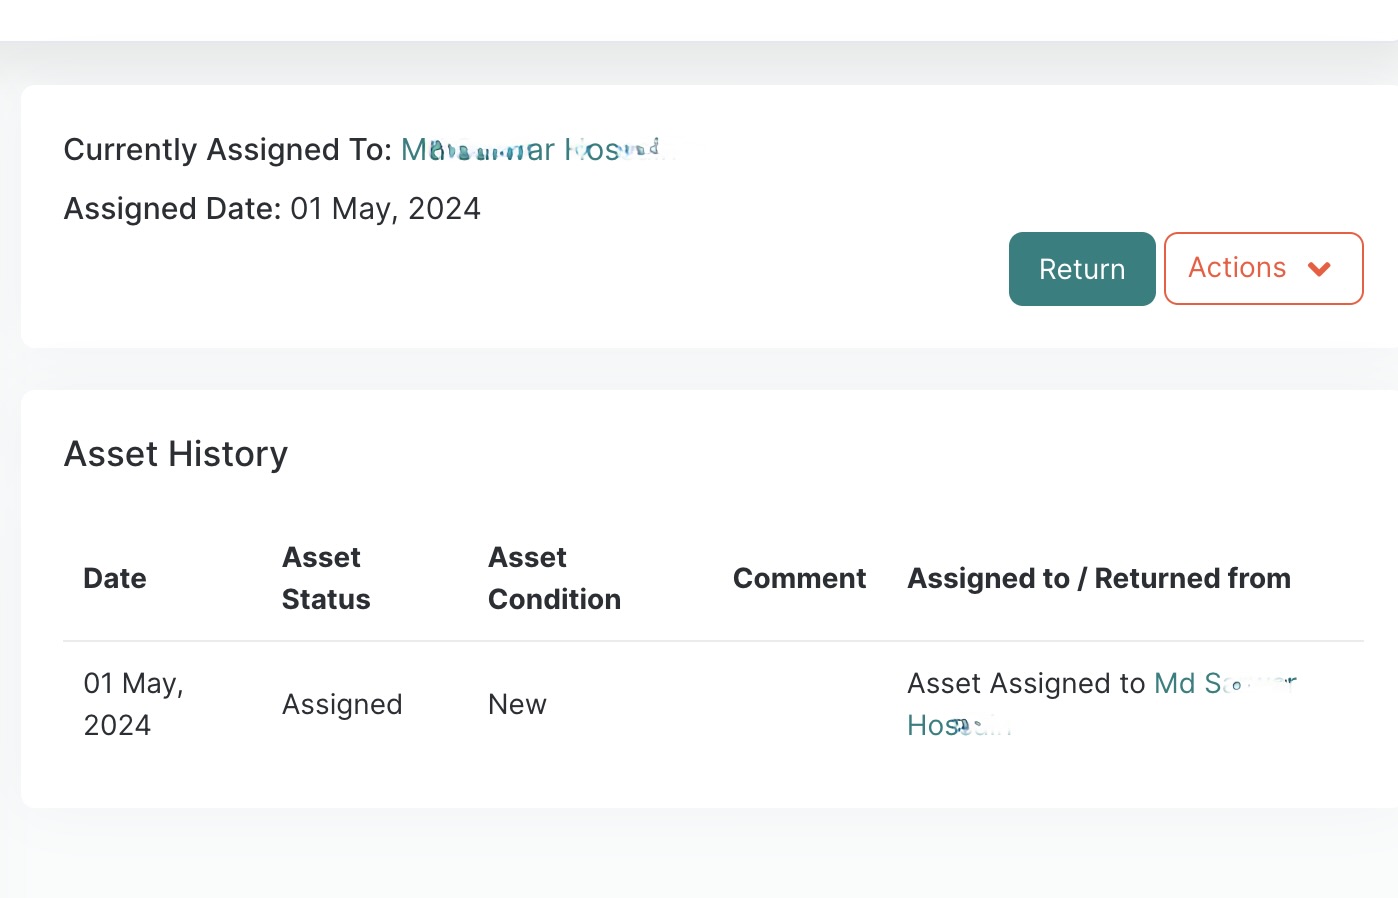
Assign/Re-Assign
Easily assign or re-assign assets to any employee using our simple process:
Access the Assign Option: Click on the “Assign” button to begin the process of assigning an asset.
Select the Employee: A popup will appear where you can choose which employee to assign the asset to. Simply select the desired employee from the list.
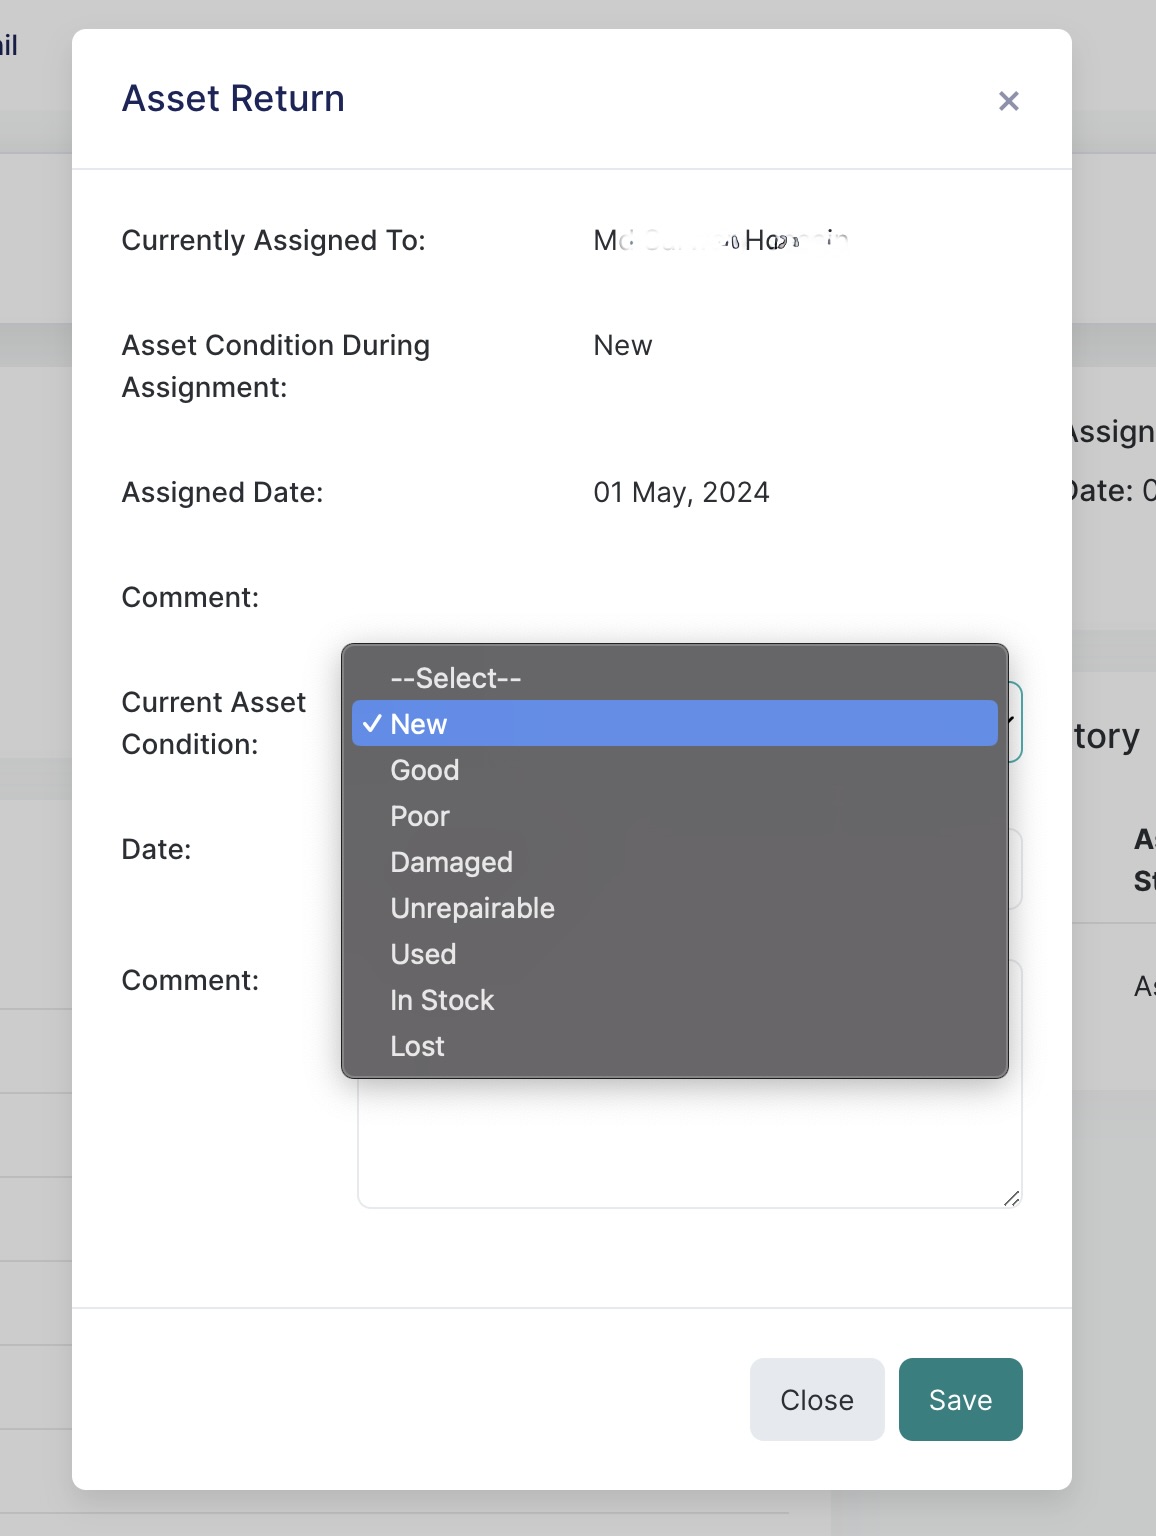
Return
When an employee needs to return an asset, the process is straightforward:
Initiate the Return: Click on the “Return” button associated with the specific asset in the employee’s inventory.
Select the Asset’s Condition: During the return process, you will be prompted to assess and select the current condition of the asset. Choose the appropriate condition (e.g., Good, Poor, Damaged) to accurately reflect the asset’s state upon return.
This simple process helps ensure that all returned assets are properly accounted for and assessed, maintaining the integrity and accuracy of your asset management system.
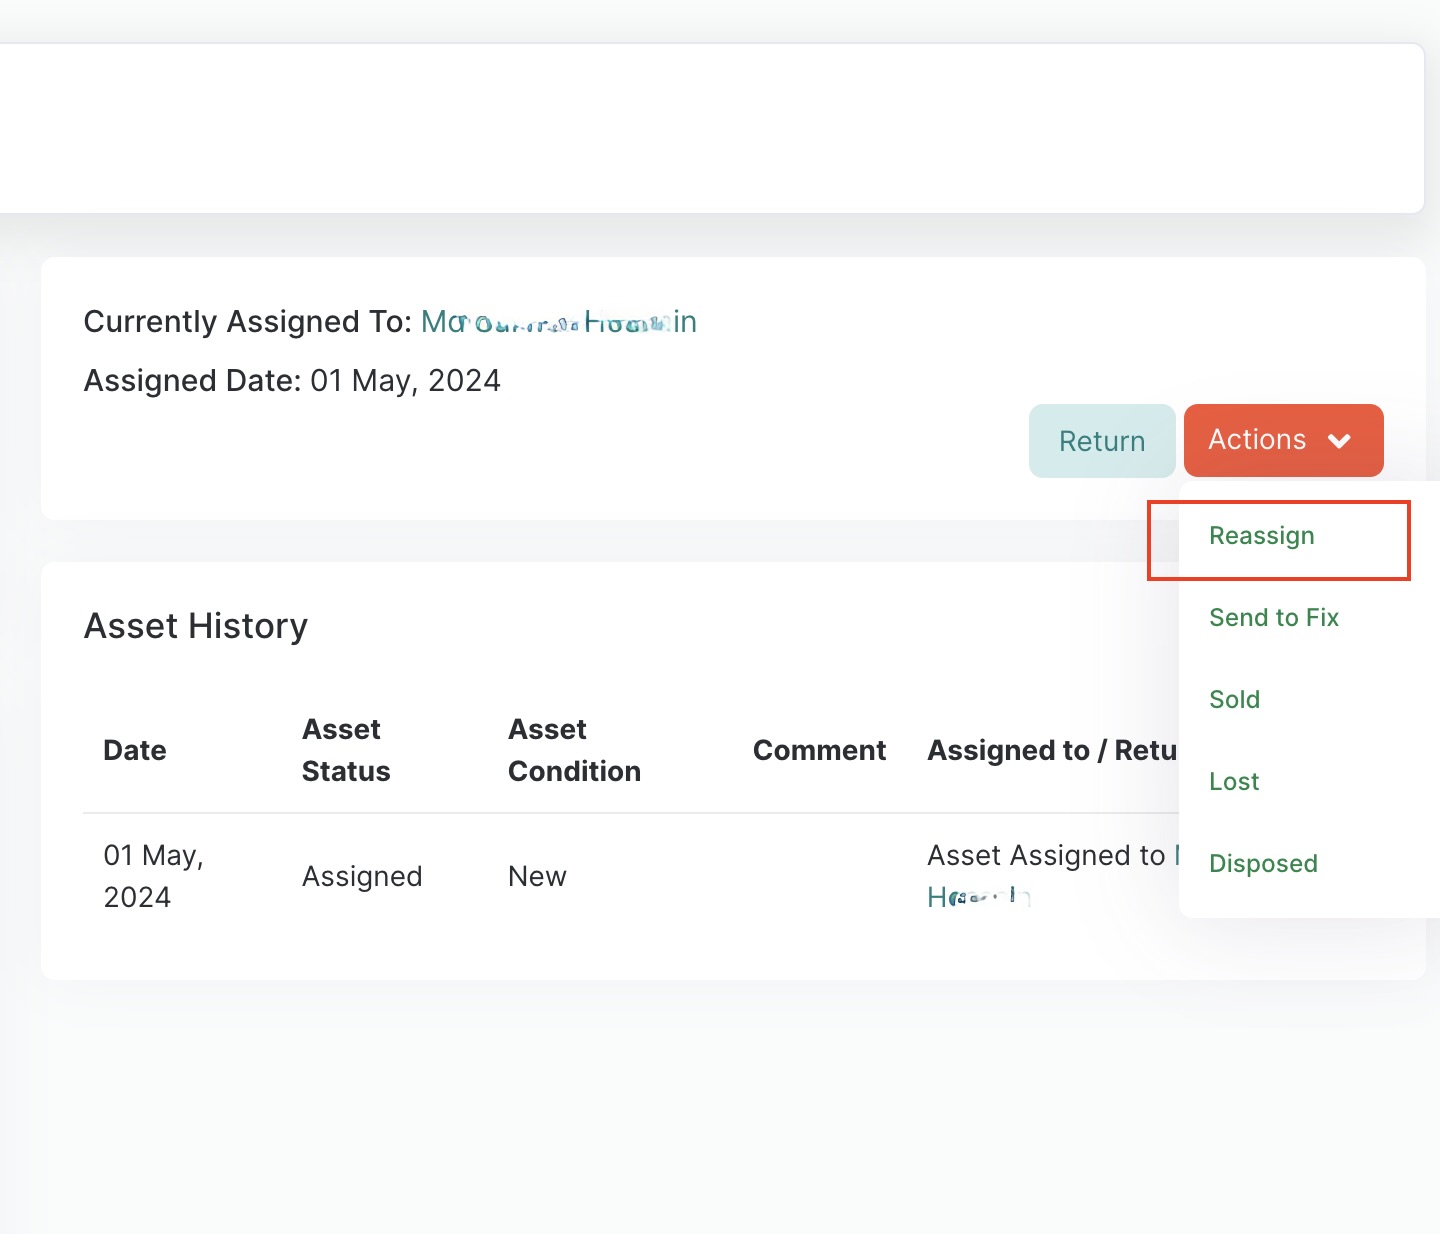
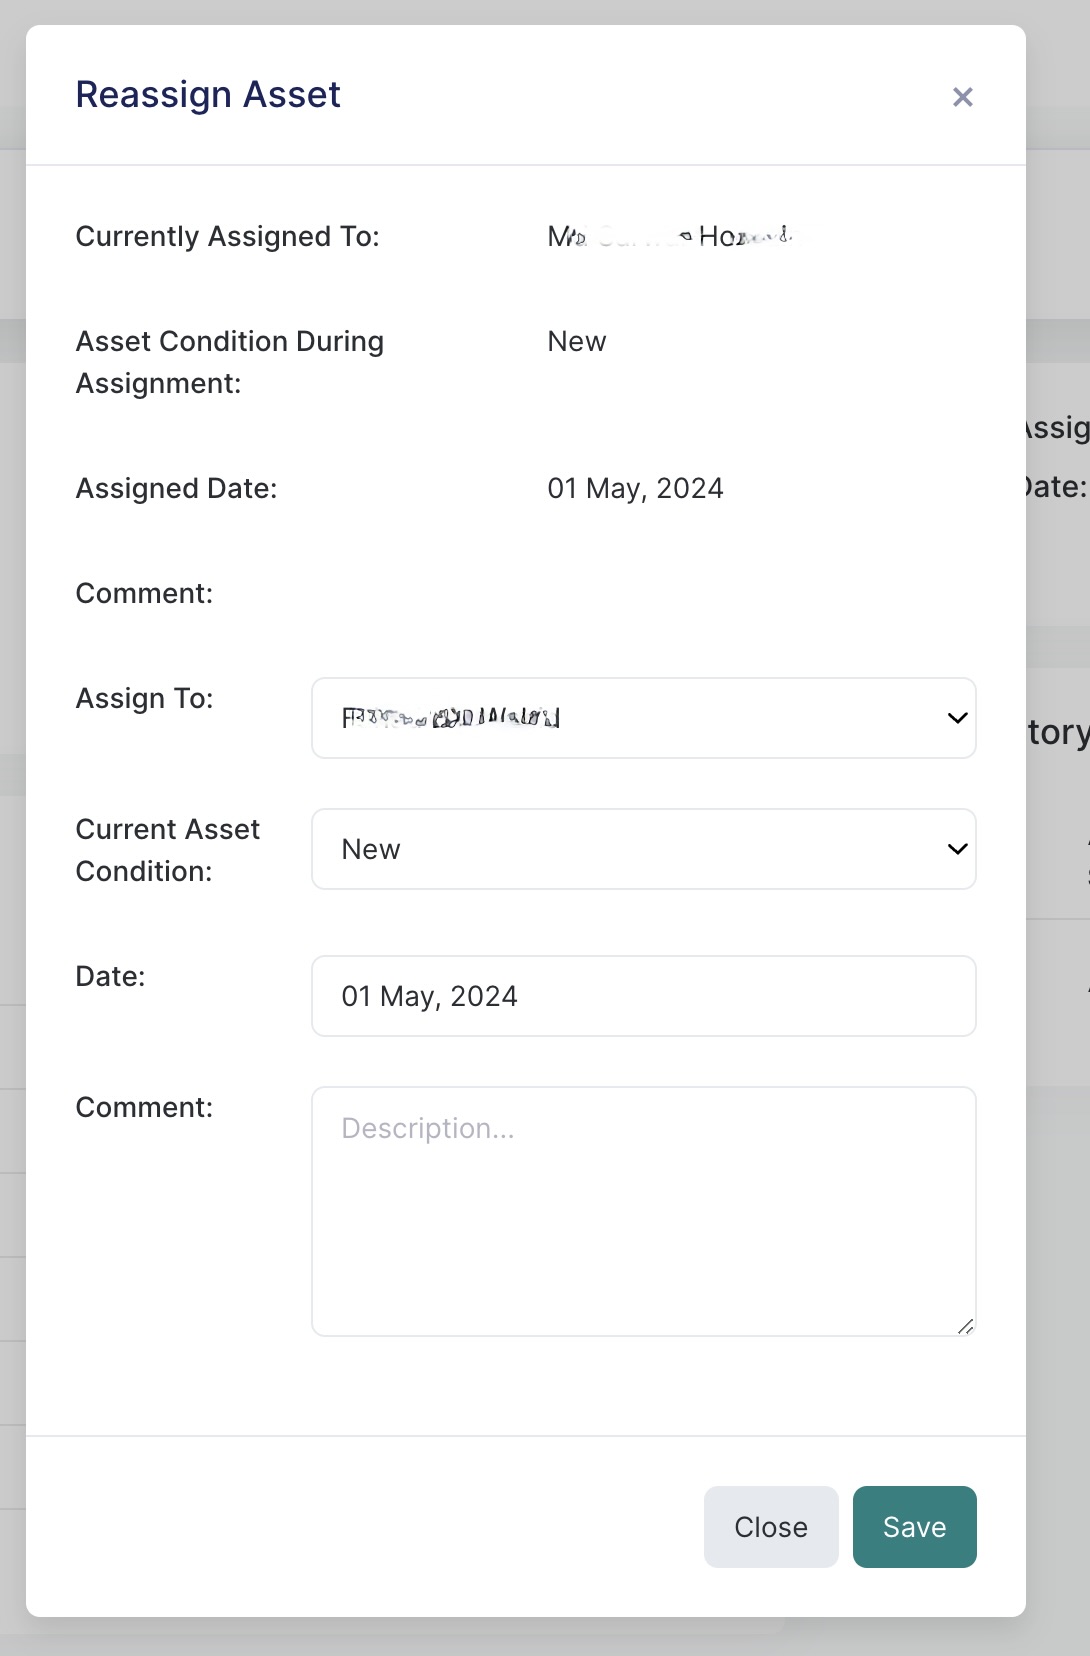
Reassign
Reassigning assets between employees is a straightforward process:
Locate the Asset: Navigate to the asset you wish to reassign within the system.
Initiate Reassignment: Click on the “Action” button next to the asset. This will open a dropdown menu or a popup window with various options.
Select Reassign: Choose the “Reassign” option from the available actions.
Choose the New Recipient: A popup will appear where you can select the new employee to whom the asset will be reassigned.
This process ensures that asset reassignment is handled efficiently, with clear tracking and accountability for each asset’s movement within your organization.
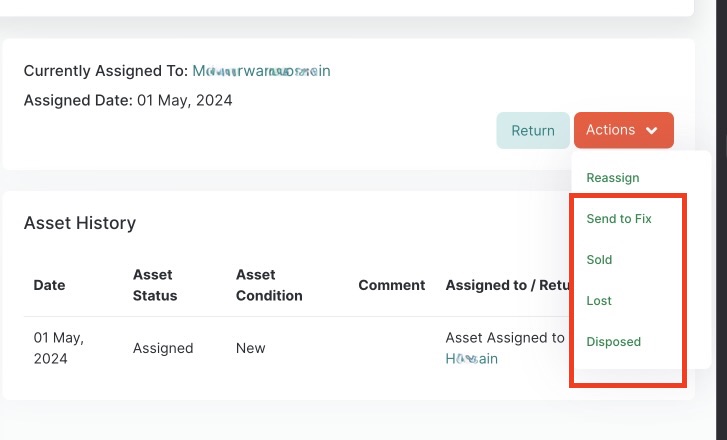
Actions: Changing Asset Status
Manage the status of your assets effectively with the following options:
Access the Actions Menu: Click on the “Actions” button associated with any asset in your inventory. This will display a list of possible status changes.
Select the Desired Action: You can choose from the following status updates based on your needs:
Send to Fix: Use this option when an asset needs repairs.
Sold: Select this when an asset has been sold.
Lost: Report an asset as lost.
Disposed: Use this when an asset is no longer usable and has been disposed of.
Update Details in Popup: After selecting an action, a popup will appear. Here, you can enter any relevant details about the status change, such as the date, reason, or any notes related to the action.
View History: All past actions and status updates related to the asset are recorded and can be viewed at any time. This history helps track the lifecycle of each asset and provides transparency in asset management.
These actions allow for precise control over your asset inventory, ensuring that each change in status is documented and easy to review.
Let us know you agree cookies
We use cookies to give you the best online experience. Please let us know if you agree to all of these cookies.